Thursday, September 7, 2017

Glutinous Peanut Balls aka Loh Mai Chi or Peanut Mochi (花生糯米糍)


Some people call this snack/dessert the peanut sesame glutinous rice balls or glutinous peanut balls or loh mai chi or peanuts mochi. I occasionally make this as supper for my church friends when I attended the Saturday night group. This snack/dessert is really similar to the Japanese mochi but the "snow skin" is actually softer in texture as compare to the Japanese mochi. Honestly speaking, if you want to make this, you got to be very calm and patient especially when wrapping fillings like toasted crushed peanuts and sesame seeds.
https://bankertobaker.blogspot.com.au/2017/09/glutinous-peanut-balls-aka-loh-mai-chi.html


Now, about the making...

For the skin:
250g glutinous rice flour
2 cups of water 
100g sugar
1.5 tsp oil (optional)

For filling:-
300g toasted crushed peanuts
50g toasted sesame seeds
100g sugar (or castor sugar)

Flour for coating:-
80-100g rice flour 

Note: This recipe makes about 24-25 glutinous peanut balls

The steps:-
1) To make the toasted peanuts and sesame seeds, you could either place the crushed peanuts in oven or stir fry them until aromatic. (Note: Beware of burning the peanuts if not careful.) 


  • I usually pan fry the crushed peanuts and sesame seeds instead of placing them in oven. As I bought the cooked crushed peanuts, all I need is to stir fry them in an ungreased pan for maybe about 5-10min with medium low to medium heat until you could smell the nice aroma of the peanuts and sesame seeds.
  • Remove the fried / toasted peanuts and sesame seeds from heat. Leave it to cool for awhile before placing them in a container.
2) Once the toasted peanuts and sesame seeds are cooled, add in the castor sugar and mix well. Note: Do not cover the container with the lid until it is completely cooled.


3) Next, you could start making the skin for the glutinous balls. In a bowl, put in all the ingredients for the skin. Stir with a spoon until well mixed. Then, pour this liquid mixture into a lightly greased steaming tray and steam for about 30-35minutes with medium heat.


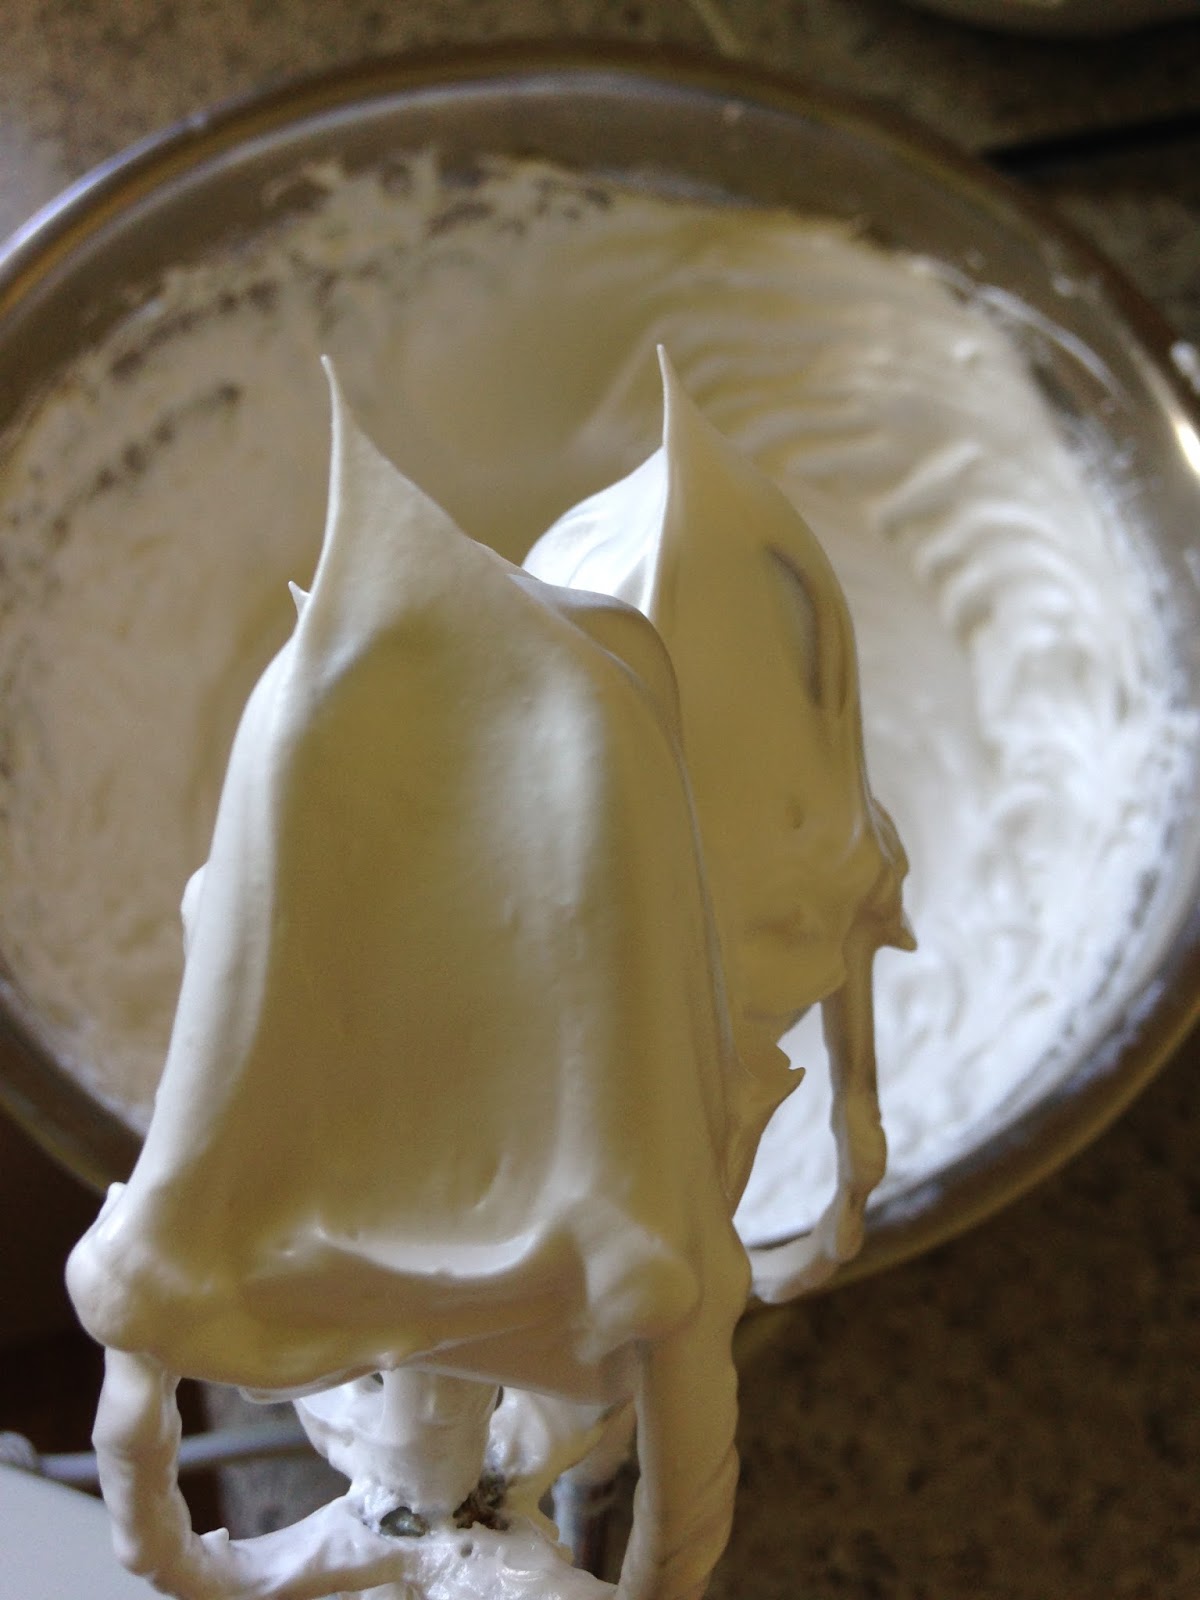
The look of the cooked glutinous rice dough skin

4) Once the skin for the glutinous peanut balls is cooked, remove it from heat and leave aside to cool.

5) While waiting, let's prepare the cooked rice flour for coating the glutinous peanut balls during the wrapping process. All you need to do is to place the rice flour in an ungreased pan and stir fry it for about 10-15 minutes with medium low or low heat until cooked. (Note: To test the flour, just touch some of the rice flour in the pan and feel it. If you feel that the flour is quite dry but smooth, then it is considered cooked. Do not stir fry the rice flour with high heat to avoid burning or browning the rice flour.)

I guess the hardest part for me is the wrapping process as I have not found any faster way to wrap the filling. And, if you are too greedy by placing too much of the filling, the dough skin might break and hard to be rescued...

The wrapping steps...
1) Removed the cooled glutinous rice dough from the steaming tray. Flour the dough with some cooked rice flour and cut it into squares ie about 2.5cm x 2.5cm each.

2) Take one portion of the dough skin, press slightly in the middle with your thumb to make a inverted bell curve.
3) Slowly put in a quarter teaspoon of filling and press it gently with your thumb. 
Note: If you feel sticky, flour a little cooked rice flour around the sticky skin part.
**Repeat this step 4 to 5 times with a quarter teaspoon of filling each time. Note: Total filling for each glutinous peanut balls is between 1 - 1.5 tbsp of filling. Do not place too much of filling as it might break the skin when sealing the dough ball.
** For easier sealing of the dough ball, hold the filling in place by gently pressing on it with one of your thumb while the other hand working on sealing the edges to make a round shape ball.
https://bankertobaker.blogspot.com.au/2017/09/glutinous-peanut-balls-aka-loh-mai-chi.html
4) To finish the process, coat the wrapped balls with some cooked rice flour before putting into a
container.
https://bankertobaker.blogspot.com.au/2017/09/glutinous-peanut-balls-aka-loh-mai-chi.html


Tuesday, September 5, 2017

Silky Tofu Pudding / Bean Curd Pudding (aka Tofu Fah / Fau Foo Fah 豆腐花 /豆花)

It has been such a long time since I updated my blog. My apology. Just been so busy with life from last year end as we moved from one suburb to another. There were lots of stressful events and I even hurt my coccyx. I was suffering from the tremendous pain for a minimum 2 months before I can stretch and run again. Anyway, thank goodness it is over. I will try my best to continue with my blogs as I wanted my boys to be able to learn the skills too!

https://bankertobaker.blogspot.com.au/2017/09/silky-tofu-pudding-bean-curd-pudding.html

Today I am going to share about the making of "tofufah / tau foo fah" which is a term in Cantonese, which means tofu pudding. This is a delicious warm dessert which served with sweet syrup ie. either coconut sugar syrup or white sugar syrup.

Now the recipe...

Traditionally, the main ingredient to make this dessert apart from the soya bean milk is the calcium sulphate (石膏粉) which is unhealthy. Now, if you google online, you probably can find alternate ways to make this dessert. 

Have you heard of GDL (Glucono-Delta-Lactone)? I heard about this from friends. I was looking high and low for recipes and I found some for your reference. Here's the recipe for an easy tofu pudding / tofu fah.
The pudding:-

2L soya bean milk (sugar free)
1 tsp of GDL
2 tsp of cornflour
250ml water
(Source: From social media)

OR 
1.5L soya bean milk (sugar free)
0.5 tsp GDL
1 tbsp. cornflour
75ml water
(Source: http://womensweekly.my/recipes/desserts/tau-foo-fah/)

OR
2L soya bean milk (sugar free)
0.75 tsp GDL
0.5 tbsp cornflour
2 tbsp water
(Source: https://wendyinkk.blogspot.com.au/2010/11/gdl-tofufah.html)

NOTE: 2L soya bean milk could make about 10-12 serve of  tofu fah (tau foo fah). For a family of 3-4, you may want to reduce the recipe by half  if you are using the first or third recipes above. However, if you don't mind having some balance of tofu fah, you can just use the above recipes.

Syrup:
3 slices of ginger 
1 piece of pandan leave
325ml water
150g white sugar (or coconut sugar) 

Since I used a ready made sugar free soya bean milk which I bought from the Asian Grocery here in Adelaide, this is how I made my tofufah....

Steps:
1) Place the soya bean milk in a pot. Bring it to boil.
2) Remove the "tofu skin" which appears on the surface while the soya bean milk was boiling.

3) When the soya bean milk is about to boil or just started to boil, quickly prepare the GDL/cornflour mixture in a separate bowl i.e. mix the GDL and cornflour into the water and stir well. (Note: I have tried the first recipe but I have not tested the rest.)
4) Place the GDL/cornflour mixture into the rice cooker (or you can use a thermal pot).
5) Then, hold the pot to about 15cm high, and quickly pour in the boiling soya bean milk into the rice cooker. If you see some bubbles appearing on the surface, gently (but quickly) remove them with a scoop or a spoon. Caution: DO NOT STIR after pouring in the boiling soya bean milk into the rice cooker with the GDL/cornflour mixture!
6) Next, quickly cover the rice cooker with a piece of clean cloth and place the rice cooker lid on top as per the picture below. Leave it untouched for about 30 minutes for the tofu pudding to set. (Note: I used the rice cooker's keep warm function when leaving the tofu pudding to set.) 
7) Moving on to the next step is to prepare the syrup. Place the syrup ingredients into a small pot and bring it to boil. When the syrup is boiling, let it boil to a couple of minutes until the water is slightly reduced. (Note: You can change it to lower heat when the syrup is boiling and let it simmer for a few minutes.) To test the sweetness of syrup, please do taste it to see whether it is sweet enough before you decide whether to add little bit more sugar. :) 
 
The syrup

The look of the silky tofu pudding after it was set.

8) When the tau foo fah is ready, "thinly" scoop it into the serving bowls and pour in a few scoop of the syrup. 

9) Preferably, tau foo fah is eaten best when it is still hot/warm.

https://bankertobaker.blogspot.com.au/2017/09/silky-tofu-pudding-bean-curd-pudding.html
Silky tau foo fah is now served! Enjoy! :)

Sunday, December 25, 2016

Almond Bread aka Biscouti (杏仁脆饼)


Almond bread (also known as biscouti). Anyone? This is also one of my favourite cookies especially during Chinese New Year celebration. Despite of having many things to settle recently, I have decided to make this during this Christmas season as I feel like making this for my children. :)

Here's how I make this almond bread or biscouti:-
3 large egg white
110g-120g icing sugar
120g plain flour
120g unblanched/raw almond
**Need 1 loaf tin (around 20cm x 10cm size but mine is slightly bigger)
Note: To make biscouti, you have Day 1 and Day 2 processes as you need to chill in the fridge for at least 1 day before Day 2 steps.


Now the steps...

Day1:-

(1) Whisk egg white until just frothy..


(2) Slowly add in the icing sugar and continue to whisk the egg whites until the meringue become stiff (ie. could form a small peak). (Note: For every add of sugar, I added in 1/4 of the icing sugar.)

  
(3) Then, add in flour and almond. Fold lightly with the meringue until just mixed.
 

(4) Line in baking paper in the loaf tin and put in the almond meringue mixture.

(5) Bake in pre-heated oven at 180 degree C for about 35 minutes or until it's cooked and lightly brown. Remove from oven and let it cool down.

(6) Cover the baking paper over the loaf of baked almond bread and let it chill in the fridge for at least 1 day.

Day 2:
(7) Use a sharp knife and thinly slice the almond bread. Then arrange them on the baking tray like the picture below. (Note: As thin as you can. If you have a electric knife, it will be easier for this step.)
 

(8) Bake at 130 - 150 degree C for about 45-50 minutes until the biscouti is dry and crispy. (Note: I used 150 degree C.)

(9) Leave to cool before storing in the air tight container.

Almond bread aka Biscouti is now ready. :) How about having it with a cuppa or tea?

Wish you successful in making this! Cheers!

Wednesday, December 7, 2016

Kuih Kapit (Love Letter) Using Love Letter Toaster (鸡蛋卷 )

Kuih kapit (aka love letter), this is one "biscuit" not to be missed during Chinese New Year celebration. Very yummy and addictive. Easy and fast to eat but really, lots of effort and patience are required to make this delicious all time favourite. I still remember that an elderly aunty always make this during the Chinese New Year time and my dad will always order from her. Now that I am away from home, it is indeed not easy to find anything like that over here.

As I do not have the traditional kuih kapit mould, my mum-in-law helped me to get the electric love letter toaster from Singapore. Only make 2 at a time. Not fast but better than nothing.

Now, the recipe. I adapted the recipe from Agnes Chang's baking book for this kuih kapit:-

150g rice flour
60g plain flour
25g tapioca flour
600ml thick coconut cream (Note: I use one 400ml thick coconut cream mixed with 200ml water)
4 eggs
225g sugar (Note: preferrably castor sugar but it is okay to use normal sugar)

Steps:
1) Sift rice flour, plain flour and tapioca flour into a mixing bowl.
2) Add in the coconut cream and mix well.

3) In a separate bowl, beat eggs and sugar until well mixed.


4) Pour the eggs and sugar mixture into the flour batter. Stir and mix well. Strain.

Now, the harder part. Pouring some batter on the kuih kapit toaster.
Tips: You need to make sure that you don't pour too much batter on the toaster each time as the kuih kapit will turn out thicker like some type of love letter biscuit. In addition, too much batter will end up having not crispy edges, hence, more work needed to trim the edges with kitchen scissors.

Tips: For each bake, the little batter you pour on the toaster should not be more than the inner circle as pointed.

5) Pour in a little batter on the kuih kapit toaster, cover and bake it until the desired brown (light golden brown)  (Note: If I remember correctly, I think I put about 0.75 tbsp batter per kuih kapit.)


**Picture shows: The look of the batter when it was baking at initial stage. Remember to pull down the toaster cover for baking as you need the kuih kapit pattern and both side of the kuih kapit to be brown.

 **Pull down the cover during the baking process


 **Picture shows: Browning stage but not ready yet.

When it was baking, the toaster light will turn on. So, when the toaster light is off, wait for 30 second and open the toaster cover to check whether the kuih kapit is brown enough. If not, pull down the cover again and let it bake a little longer.

 Once the kuih kapit is brown enough, quickly fold it into half and then quarter like the above picture. Remember, you need to fold the kuih kapit immediately when it is hot, otherwise, it will be "harden" and it will break when you fold. (Tips: I use a pair of chopstick to help me with the folding to avoid fingers touching the hot toaster.)

Repeat step 5 until batter finishes.

**This recipe makes about 2 to 2.5 containers of kuih kapit.

My boys finished 1 container of kuih kapit in a day. Wow! So much effort from mum! I will only make this occasionally as I was standing in my kitchen for about 2.5 hours for this much of batter.


Sunday, November 27, 2016

Steamed Glutinous Rice With Chicken, Mushrooms and Chinese Sausages (Sticky Rice) (糯米鸡)- Loh Mai Kai

Do you want to learn this? The steamed glutinous rice with chicken, mushrooms and Chinese sausages, which also known as "loh mai kai" in Cantonese or some people called it sticky rice. The related photos have been sitting in my photo album for a week plus now. I just haven't got the time to arrange them properly for my blog post as I was caught up with many matters! o_O

Okay, let's go straight to the points..

Firstly, the main ingredients needed...
(1) 2 Chinese sausages (lap cheong 腊肠) - Note: Please remove the thin layer of the sausage skin.
(2) 10 Chinese black mushrooms
(3) 450g glutinous rice (to make 10 bowls of sticky rice ie. Loh Mai Kai)
(4) About 800g chicken breast fillet

DAY 1......

- The glutinous rice: Wash the glutinous rice and soak in water overnight.
- The mushrooms: Wash the mushrooms and soak them with about 1.5 cups of water until completely soft. (Note: I used 1.5 cups of water for soaking the mushrooms as I need to retain it for steaming the glutinous rice on the following day.) 
Note: Please do cover them with a pot cover or any cover so that no "tiny creatures" crawl in while you are resting. ;)

- The chicken: Slice the chicken fillet into thick chicken slices. Thickness depending on personal preferance, but not too thin nor too big pieces.

>> Put the chicken slices in a bowl. Then, when the mushrooms are soften, remove the mushrooms from the water and place them together with the chicken slices. Now, do not pour away the mushroom water. Please KEEP it for later use.

 *Setting aside the mushroom water for later use.

>> For the bowl of chicken and mushrooms, mix in....
- 2 tsp garlic powder
- 2 tsp sesame oil
- 2 tbsp light soy sauce
- 0.5 tsp white pepper
- 0.5 tsp salt
- 3 tsp sugar
- 1.5 tbsp oyster sauce
- about 2 tbsp Chinese cooking wine (Shao Xing)
- 1 tbsp cooking caramel
Use a cling wrap or any cover to cover over the bowl and place it in the fridge to marinate overnight.


*Marinating the chicken and mushrooms

DAY 2....


- Place the glutinous rice in a lightly greased steaming tray and pour in 1 cup of the mushroom water. (Note: I just use little cooking oil to grease the steaming tray.)
- Then, add in:-
- 1.5 tsp sesame oil
- 0.75 tsp (ie. 3/4 tsp) salt
- about 1.5 tsp Chinese five spice powder (*you may reduce this slightly if you do not like to have too much of Chinese five spice powder)
- 0.5 tsp white pepper
- 2 tsp sugar
- 2 tbsp oyster sauce
- 3 tsp soy sauce (light)
- 1.25 tsp cooking caramel
And use a spoon to stir the seasoning around until well mixed.


- Next, steam over boiling water for about 15 minutes with medium high heat. (Note: Cover the steamer when steaming the glutinous rice.
*Note: For photo purpose, I have removed the cover to snap a picture. Please do cover the steamer during the steaming process.

- Then, remove the cover and use a chopstick to stir and mix in order to loosen the rice.

- Use the back of a rice scooper to smoothen the rice again and place the Chinese sausages on top. Continue to steam the glutinous rice (coverred) for another 20-25 minutes or until the rice is cooked. (Note: I steamed for 25 minutes.)

- While the steamer is steaming the glutinous rice, you may work on the chicken and mushrooms.
- In a pot, heat up 1-2 tablespoon of cooking oil, then put in the chicken pieces and mushrooms. (Note: Keep the marinade for later use.)
- Stir fry them until the chicken pieces are almost cooked. Then, add in half the marinade that used to marinade the chicken and mushroom and add about 1 tsp of salt and 2 tsp of soy sauce. Continue to cook until the chicken are completely cooked.

- When the glutinous rice is cooked, remove the rice and the Chinese sausages from the steamer. Thinly slice the Chinese sausages and set them aside for later use.  

To assemble the Loh Mai Kai:-
 
- Lightly greased the bowls with little bit of cooking oil.
- Plase 1 mushroom, 2 pieces of chicken, 2 or 3 slices of Chinese sausages and about 1 to 1.5 tbsp of the cooked chicken and mushroom sauce into each of the greased bowls.
- Then, put in the cooked glutinous rice and pressed firmly to cover the fillings as per the photo below.
- Return all the bowls of sticky rice in the steamer and steam over medium high heat for about 30 minutes.
- Then, your Loh Mai Kai are ready to be served!!!
**Use a plastic knife to cut around the edges, invert the bowl and pour out the Loh Mai Kai..
Hope you all enjoy making them at home! :) My boys love it especially my 11 year old kiddo. He ate 2 Loh Mai Kai like mum and dad now! o_O He was delighted and so happy that he could bring this to school for lunch the next day when there's balance which we couldn't finished.