Sunday, December 25, 2016

Almond Bread aka Biscouti (杏仁脆饼)


Almond bread (also known as biscouti). Anyone? This is also one of my favourite cookies especially during Chinese New Year celebration. Despite of having many things to settle recently, I have decided to make this during this Christmas season as I feel like making this for my children. :)

Here's how I make this almond bread or biscouti:-
3 large egg white
110g-120g icing sugar
120g plain flour
120g unblanched/raw almond
**Need 1 loaf tin (around 20cm x 10cm size but mine is slightly bigger)
Note: To make biscouti, you have Day 1 and Day 2 processes as you need to chill in the fridge for at least 1 day before Day 2 steps.


Now the steps...

Day1:-

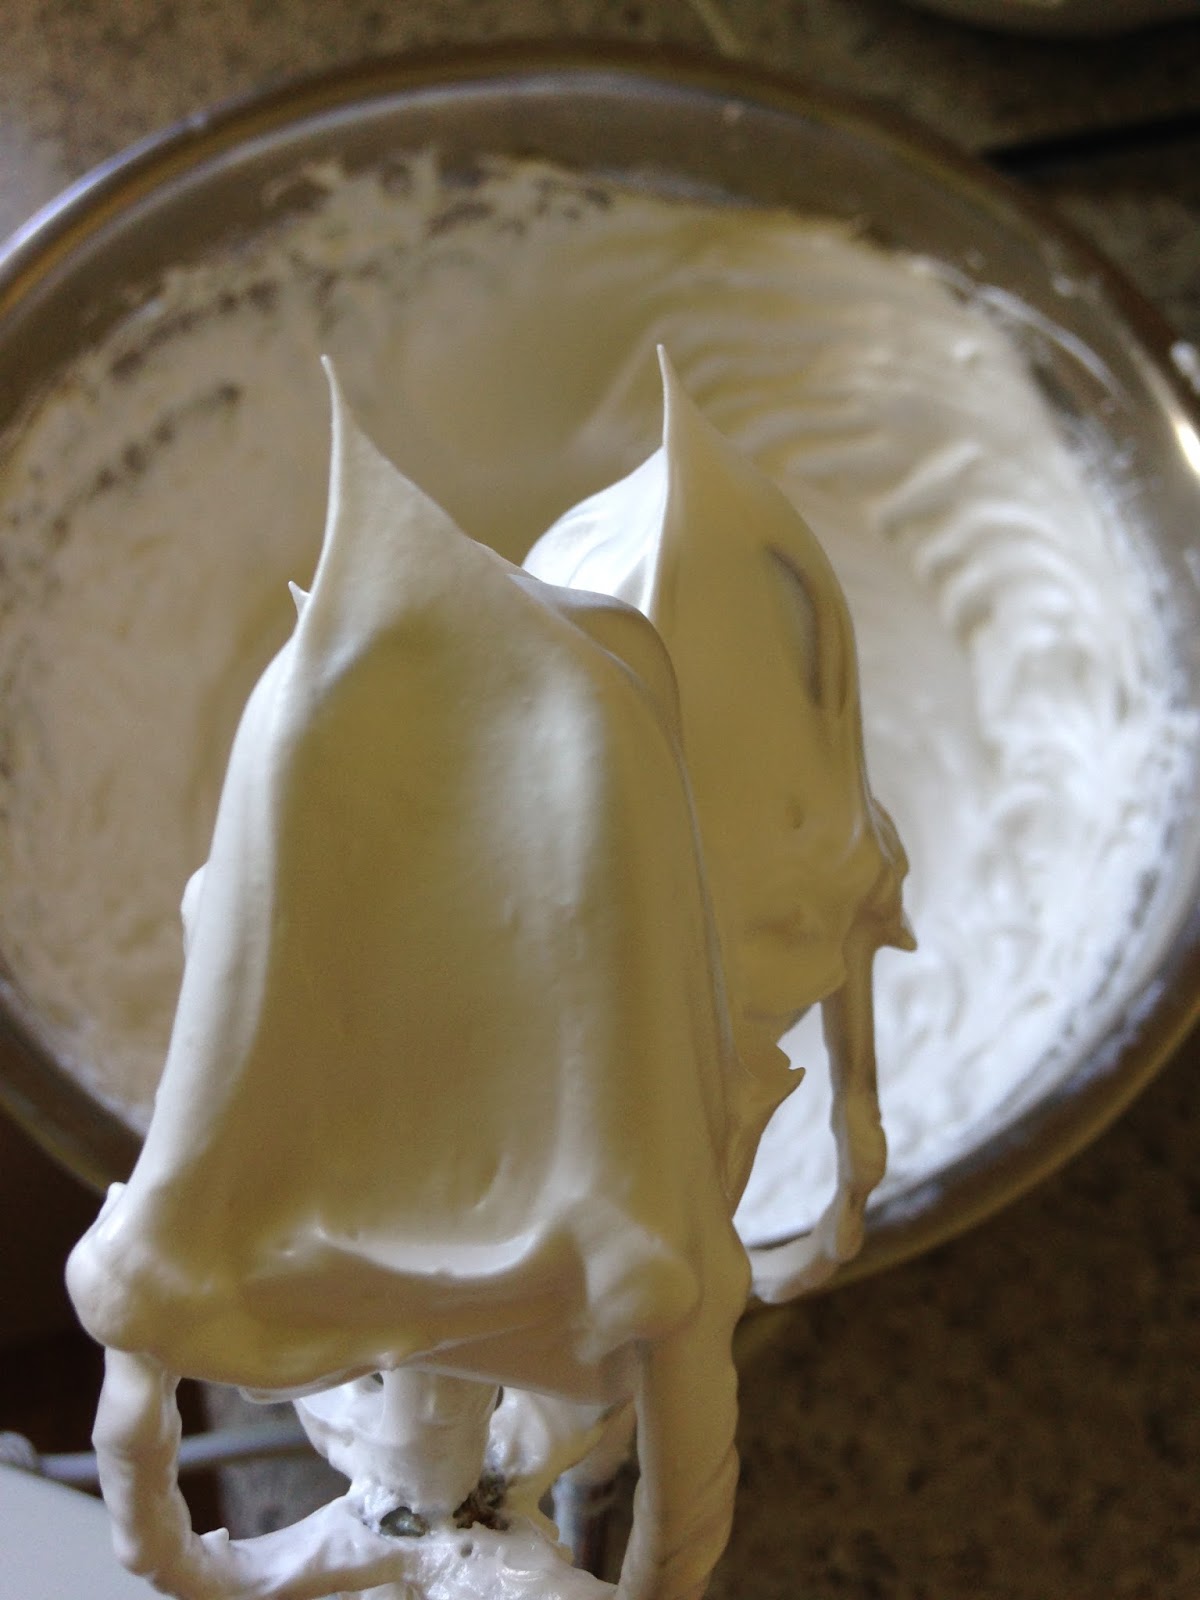
(1) Whisk egg white until just frothy..


(2) Slowly add in the icing sugar and continue to whisk the egg whites until the meringue become stiff (ie. could form a small peak). (Note: For every add of sugar, I added in 1/4 of the icing sugar.)

  
(3) Then, add in flour and almond. Fold lightly with the meringue until just mixed.
 

(4) Line in baking paper in the loaf tin and put in the almond meringue mixture.

(5) Bake in pre-heated oven at 180 degree C for about 35 minutes or until it's cooked and lightly brown. Remove from oven and let it cool down.

(6) Cover the baking paper over the loaf of baked almond bread and let it chill in the fridge for at least 1 day.

Day 2:
(7) Use a sharp knife and thinly slice the almond bread. Then arrange them on the baking tray like the picture below. (Note: As thin as you can. If you have a electric knife, it will be easier for this step.)
 

(8) Bake at 130 - 150 degree C for about 45-50 minutes until the biscouti is dry and crispy. (Note: I used 150 degree C.)

(9) Leave to cool before storing in the air tight container.

Almond bread aka Biscouti is now ready. :) How about having it with a cuppa or tea?

Wish you successful in making this! Cheers!

Wednesday, December 7, 2016

Kuih Kapit (Love Letter) Using Love Letter Toaster (鸡蛋卷 )

Kuih kapit (aka love letter), this is one "biscuit" not to be missed during Chinese New Year celebration. Very yummy and addictive. Easy and fast to eat but really, lots of effort and patience are required to make this delicious all time favourite. I still remember that an elderly aunty always make this during the Chinese New Year time and my dad will always order from her. Now that I am away from home, it is indeed not easy to find anything like that over here.

As I do not have the traditional kuih kapit mould, my mum-in-law helped me to get the electric love letter toaster from Singapore. Only make 2 at a time. Not fast but better than nothing.

Now, the recipe. I adapted the recipe from Agnes Chang's baking book for this kuih kapit:-

150g rice flour
60g plain flour
25g tapioca flour
600ml thick coconut cream (Note: I use one 400ml thick coconut cream mixed with 200ml water)
4 eggs
225g sugar (Note: preferrably castor sugar but it is okay to use normal sugar)

Steps:
1) Sift rice flour, plain flour and tapioca flour into a mixing bowl.
2) Add in the coconut cream and mix well.

3) In a separate bowl, beat eggs and sugar until well mixed.


4) Pour the eggs and sugar mixture into the flour batter. Stir and mix well. Strain.

Now, the harder part. Pouring some batter on the kuih kapit toaster.
Tips: You need to make sure that you don't pour too much batter on the toaster each time as the kuih kapit will turn out thicker like some type of love letter biscuit. In addition, too much batter will end up having not crispy edges, hence, more work needed to trim the edges with kitchen scissors.

Tips: For each bake, the little batter you pour on the toaster should not be more than the inner circle as pointed.

5) Pour in a little batter on the kuih kapit toaster, cover and bake it until the desired brown (light golden brown)  (Note: If I remember correctly, I think I put about 0.75 tbsp batter per kuih kapit.)


**Picture shows: The look of the batter when it was baking at initial stage. Remember to pull down the toaster cover for baking as you need the kuih kapit pattern and both side of the kuih kapit to be brown.

 **Pull down the cover during the baking process


 **Picture shows: Browning stage but not ready yet.

When it was baking, the toaster light will turn on. So, when the toaster light is off, wait for 30 second and open the toaster cover to check whether the kuih kapit is brown enough. If not, pull down the cover again and let it bake a little longer.

 Once the kuih kapit is brown enough, quickly fold it into half and then quarter like the above picture. Remember, you need to fold the kuih kapit immediately when it is hot, otherwise, it will be "harden" and it will break when you fold. (Tips: I use a pair of chopstick to help me with the folding to avoid fingers touching the hot toaster.)

Repeat step 5 until batter finishes.

**This recipe makes about 2 to 2.5 containers of kuih kapit.

My boys finished 1 container of kuih kapit in a day. Wow! So much effort from mum! I will only make this occasionally as I was standing in my kitchen for about 2.5 hours for this much of batter.